Complete Guide on How to Care for Alocasia Amazonica Plant
Alocasia amazonica plant, often sold under names like Alocasia × amazonica, Alocasia Polly, or just “Polly,” is one of the showiest houseplants you can grow. Its dramatic, arrowhead-shaped, glossy leaves with pale veins give it an almost sculptural look that works in modern apartments and plant-filled homes alike. But beauty comes with a bit of fuss: Alocasias have specific needs (light, humidity, and water balance) if you want glossy, full leaves rather than limp, yellow ones.
This guide is a complete, practical, step-by-step manual for caring for Alocasia amazonica. I’ll cover identification, the ideal environment, watering, soil and potting, feeding, propagation, problems and fixes, styling tips, and a helpful FAQ. Read it all the way through, or jump to the section you need.
Alocasia amazonica plant: Quick summary
- Light: Bright, indirect light. Avoid direct midday sun.
- Water: Keep evenly moist during active growth; allow top 2–3 cm (¾–1¼ in) of soil to dry between waterings. Also, do not let it sit in water for good growth.
- Humidity: High — 60–80% ideal.
- Temperature: Warm, 18–27°C (65–80°F). Avoid below 15°C (59°F).
- Soil: Fast-draining, airy, moisture-retentive mix (peat/coco + perlite + bark).
- Fertilizer: Balanced houseplant fertilizer at half-strength every 3–6 weeks during spring–summer.
- Toxicity: All parts are toxic to pets and humans (due to calcium oxalate crystals).
- Propagation: Division of rhizomes/offsets (best) or tuber separation.
- Common problems: Over- or underwatering, low humidity, pests (spider mites, mealybugs), and root rot.
What is the Alocasia amazonica plant?
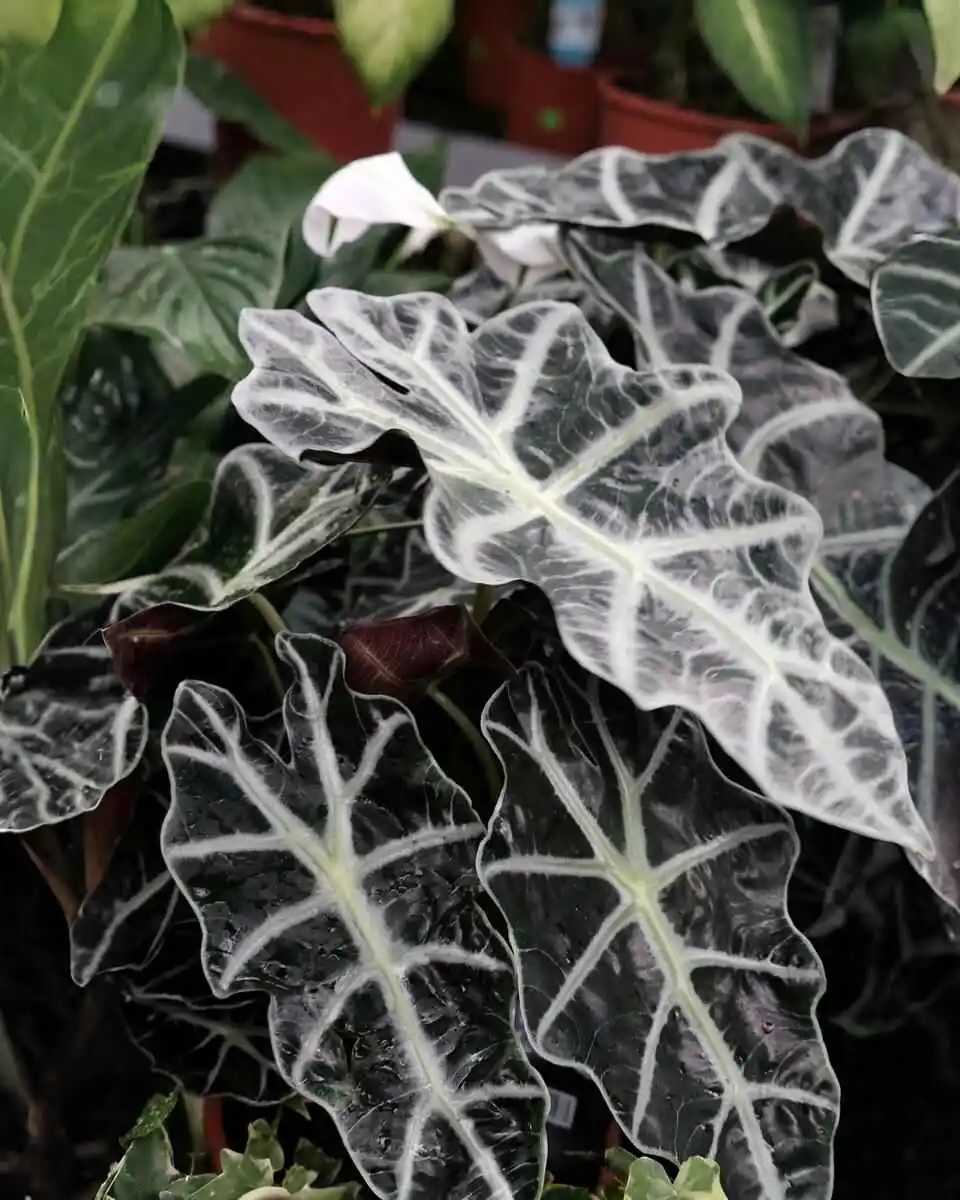
Alocasia amazonica is not a wild species native to the Amazon; it’s a hybrid or cultivar developed for its compact, dramatic foliage. The leaves are typically dark green to almost black with pronounced lighter veins and a glossy surface. The plant has an upright, clumping habit, with each leaf on a distinct petiole, giving an architectural, tropical look.
Why people love it:
- Statement foliage with bold contrast and texture.
- Compact size compared to larger alocasias, making it suitable for indoor spaces.
- Great as a focal houseplant or in groups with other tropicals.
Keep in mind: because it’s selected for appearance rather than toughness, it’s a little more sensitive than many other houseplants — but with the right care, it rewards you with showy foliage.
Identifying the Alocasia amazonica plant
Knowing what you have helps you care for it properly. Look for:
- Arrowhead-shaped leaves with sharp lobes.
- Deep green, glossy surface with pale or silvery veins.
- Leaves are typically on long petioles from a central crown.
- Compact clumping habit — new leaves emerge from pseudostems or rhizomes/offsets.
If your plant has smaller, very rounded leaves or very different patterns, it could be a different Alocasia cultivar (e.g., ‘Bambino’, ‘Polly’, ‘Amazonica’ variants). But the care principles below apply to most indoor alocasias with similar habits.
Buying guide: what to look for when purchasing an Alocasia amazonica plant
When buying an Alocasia amazonica (or cultivar like ‘Polly’):
- Leaf condition: Look for glossy, firm leaves without large brown patches, holes, or extensive yellowing. Some leaf damage is OK on nursery plants, but severe spotting indicates stress.
- Rhizome and roots: If you can see the root ball, look for healthy, firm roots (not mushy or rotten).
- Pest check: Inspect the underside of leaves, leaf axils, and soil surface for mealybugs, webbing, or tiny specks (spider mites).
- Size and price: Smaller plants are cheaper but may take a bit longer to show off their form. Variegated or rare sport varieties will be priced higher.
- Acclimation: When you bring the plant home, quarantine for 2–3 weeks. Water lightly and keep in bright, indirect light to reduce transplant shock and maintain humidity. Water lightly until it settles in. Gradually move to your normal spot over 1–2 weeks.
Light: how much and where to place the Alocasia amazonica plant
Goal: Bright, indirect light. Think “filtered tropical forest light,” not full sun, for good growth.
Placement tips:
- East- or north-facing windows (with some nearby bright indirect light) work well.
- A few meters/feet back from a south- or west-facing window where the light is bright but not direct midday sun is ideal.
- If placed in direct sun, leaves may scorch (brown patches). If too dark, the plant will become leggy, produce smaller leaves, and look dull.
Signs of incorrect light:
- Too low: slow growth, small leaves, loss of leaf sheen.
- Too much direct sun: bleached, crispy brown patches.
If natural light is insufficient, use a full-spectrum grow light placed a foot or two above the plant for 8–12 hours daily.
Watering: strike the balance
Alocasias hate both being bone-dry and sitting in water. The aim is consistently even moisture (not soggy) during growth and a slightly drier rest during winter dormancy.
Watering routine:
- Check the top 2–3 cm (¾–1¼ in) of potting mix. If it’s dry, water thoroughly. If it’s still moist, wait.
- When watering, soak until water runs out of the drainage holes, then empty the saucer after 15–30 minutes. Never leave the pot in standing water for long.
- In spring–summer (active season), water more often; in fall–winter, water less often. Plants grow more slowly and need less water.
Practical tips:
- Use room-temperature water to avoid shocking roots.
- If your tap water is very hard or high in salts/chlorine, occasionally flush the potting medium with plenty of water to leach salts, or use filtered/rain/ distilled water for sensitive plants.
- Consider a moisture meter if you’re unsure, but learn to judge by touch too.
Signs of watering problems:
- Overwatering: yellowing lower leaves, mushy stems, root rot smell.
- Underwatering: drooping leaves, brown crispy edges, and soil pulling away from the pot wall.
Soil and potting: give roots oxygen + moisture
Alocasias like a potting medium that retains some moisture but drains fast and stays airy around the roots.
Recommended potting mix:
- 40% high-quality indoor potting mix or peat-free compost
- 30% perlite (for drainage and aeration)
- 20% orchid bark or chunky coco coir (improves drainage and structure)
- 10% coco coir or peat (helps retain moisture)
You can replace peat with coconut coir to be more sustainable.
Pot choice:
- Use a pot with drainage holes. Terracotta is great because it breathes and helps moderate moisture, but plastic is fine if you’re diligent about watering.
- Avoid oversized pots — alocasias prefer slightly snug conditions. Increase pot size by only 1–2 inches (2–5 cm) in diameter when repotting.
Repotting schedule:
- Young plants: repot every 12–18 months when the roots fill the pot.
- Established plants: every 18–24 months.
- Repot in spring when new growth starts. If only refreshing the soil, you can top-dress with a fresh mix.
Pot size, containers, and repotting for the Alocasia amazonica plant
When to repot: Young plants often need repotting every 12–18 months; mature plants can wait 18–24 months. Repot in spring when growth resumes.
Signs it’s time to repot:
- Roots growing out of drainage holes.
- The plant becomes top-heavy and dries out very quickly after watering.
- Soil has compacted and holds less water.
How much bigger: Increase pot diameter by 2–4 cm (1–2 in) — don’t jump more than one pot size up. Alocasias like to be slightly root-bound; a too-large pot promotes soggy soil and root problems.
Repotting steps:
- Choose a fresh, well-draining mix.
- Then gently remove the plant and shake off the old soil.
- Inspect roots; trim any obviously rotted or mushy roots.
- Place the plant at the same depth in the new pot and backfill with fresh mix.
- Water thoroughly and allow to drain.
Top-dressing vs full repot: If the plant is otherwise healthy and the roots aren’t cramped, top-dress with a fresh mix annually (remove the top 2–3 cm and add new mix) instead of a full repot.
Temperature and humidity: keep it tropical
Alocasia amazonica thrives in warm, humid conditions.
Temperature:
- Ideal: 18–27°C (65–80°F).
- Avoid sustained temps below 15°C (59°F). Sudden cold drafts or air-conditioning can stress or damage the plant.
Humidity:
- Aim for 60–80% relative humidity (RH). Household air (20–40% in winter) is too dry for peak performance.
- Methods to increase humidity:
- Group plants together to create a mini greenhouse effect.
- Use a humidifier near the plant.
- Place the pot on a tray with pebbles and water (keep the pot above water level, not sitting in it).
- Regular misting can help in the short term, but heavy misting may encourage pests if leaves stay wet; better to use a humidifier or a pebble tray for sustained humidity.
Signs of low humidity:
- Brown crispy leaf edges, browning between veins, and smaller new leaves.
Feeding/fertilizing
Alocasias are moderate feeders. Feed more during the active growth months and cut back in winter.
Routine:
- Use a balanced, water-soluble houseplant fertilizer (e.g., 10-10-10 or 20-20-20) at half-strength every 3–6 weeks during spring and summer.
- Stop or heavily reduce feeding in autumn and winter when growth slows.
Organic options:
- Fish emulsion or diluted liquid seaweed can be used once a month during spring and summer.
Why half-strength? Alocasias are sensitive to fertilizer salts; over-fertilization causes leaf tip burn and root stress.
Pruning, grooming, and leaf care
- Remove yellow or brown leaves at the base of the plant with clean scissors to tidy the plant and redirect energy.
- Cut at the petiole base; avoid tearing.
- Wipe dusty leaves occasionally with a damp cloth to keep the leaf surface clean and efficient at photosynthesis. Avoid leaf-shine products for healthy growth, as they can clog stomata.
Propagation: how to create new plants
The easiest and most reliable method for Alocasia amazonica is rhizome or offset division.
Division (best method):
- Remove the plant from its pot when repotting in spring.
- Gently shake off excess soil to reveal the root/rhizome structure.
- Identify natural divisions — offsets or separate rhizomes with their own roots and at least one growth point (eye).
- Use a clean, sharp knife to separate the rhizome, keeping as much root as possible attached.
- Dust cut surfaces with cinnamon (natural fungicide) or let them sit in a shaded, dry place for an hour to callus.
- Pot the divisions into small pots with the recommended airy mix, keep the soil evenly moist, and place them in bright, indirect light and high humidity. Also, new growth can take a few weeks.
Propagation from seeds is uncommon and impractical for most home growers. Stem cuttings are rarely used because Alocasias produce bulbs/rhizomes rather than long stems with nodes.
Common pests and diseases for the Alocasia amazonica plant and how to treat them
Pests
- Spider mites: tiny, create webbing; more common in dry air. Signs include stippling, pale speckles, and fine webbing.
- Treatment: increase humidity, wash leaves with water, apply insecticidal soap or neem oil; repeat treatments weekly until gone.
- Mealybugs: cottony white clusters at leaf axils and undersides.
- Treatment: dab with isopropyl alcohol on a cotton swab, or use insecticidal soap/neem oil for heavy infestations.
- Aphids/thrips: small insects on new growth.
- Treatment: blast with water, use insecticidal soap, or neem oil.
Prevention:
- Quarantine new plants for 2–3 weeks before introducing them to your collection.
- Keep leaves clean and humidity steady. Inspect the undersides of leaves regularly.
Diseases
- Root rot: from persistent overwatering and poor drainage — roots turn brown/black, mushy, and smell bad.
- Solution: Remove plant, cut away rotten roots with clean scissors, repot into fresh mix, reduce watering, and improve drainage.
- Fungal leaf spots: dark, irregular spots often from leaves staying wet.
- Solution: Improve air circulation, avoid overhead watering, remove affected leaves, and use a fungicide if severe.
Troubleshooting: symptoms and fixes
Yellow lower leaves
- Likely natural aging or overwatering. If only a few lower leaves, trim them off. Check watering routine and drainage.
The entire plant wilting or drooping
- Could be under-watering, overwatering (leading to root failure), or low humidity. Check soil moisture and roots.
Brown crispy leaf edges
- Usually low humidity or salt build-up from fertilizer/tap water. Increase humidity, flush the soil if salts are suspected, and reduce fertilizer strength.
Brown soft spots or black stems
- Indicates rot from overwatering or cold damage. Remove damaged parts, repot in fresh, dry mix, adjust watering and temperature.
Pale new leaves, thin or small leaves
- Low light or insufficient feeding. Move to a brighter spot and begin regular fertilizing in the growing season.
Seasonal care checklist for Alocasia amazonica plant
Spring (active growth begins)
- Repot if needed.
- Begin monthly/6-week fertilizing at half strength.
- Increase watering as new growth appears.
- Raise the humidity if it drops in winter.
Summer
- Keep bright, indirect light; watch for hotter windows that can cause leaf scorch.
- Maintain humidity and regular feeding.
- Inspect regularly for pests (spider mites are common in hot, dry months).
Autumn
- Reduce fertilization gradually.
- Begin to taper watering as growth slows.
- Continue to protect from drafts.
Winter
- Reduce watering and stop frequent feeding.
- Keep the plant in a warm, bright location away from cold drafts and heaters that dry the air.
- Maintain humidity (use a humidifier or a pebble tray).
Styling and interior design tips for the Alocasia amazonica plant
- Alocasia amazonica makes a great focal plant on a small side table, in a grouping of tropicals, or near a bright window.
- Pair it with matte or natural pots — the glossy leaves contrast beautifully with terracotta and rattan textures.
- Keep it slightly elevated on a stand so its shape and petioles show off.
- Use as a single specimen in minimalist spaces for dramatic effect, or combine with ferns and calatheas for a lush “tropical corner”.
Toxicity and safety
All parts of Alocasia contain calcium oxalate crystals, which can cause irritation, mouth swelling, difficulty swallowing, drooling, and vomiting if chewed by pets or humans. Also, keep away from pets and small children. Also, if ingestion occurs, contact a veterinarian or medical professional immediately.
If you have sensitive skin, wear gloves when handling and wash your hands after gardening.
Advanced care tips to get bigger, healthier leaves
- Maintain high humidity (60–80%). Bigger leaves come from consistent humidity and adequate light.
- Ensure steady nutrient levels in spring/summer with a diluted fertilizer.
- Use a slightly snug pot to encourage root health — alocasias don’t like being rootbound, but they also don’t like endless free space.
- Warm, consistent temps encourage larger leaves — avoid lower temps and drafts.
FAQs
Q: How often should I water my Alocasia amazonica plant?
A: In active months, water when the top 2–3 cm (¾–1¼ in) of soil is dry. This might be once a week in many homes, but it will vary with pot size, soil, light, and humidity.
Q: Why are my Alocasia leaves curling?
A: Curling is often a drought or low-humidity response. Check soil moisture and humidity; also, inspect for pests or root problems.
Q: Can Alocasia live in low light?
A: It can survive in lower light but will be leggy with smaller leaves and slower growth. Bright indirect light is recommended.
Q: Is Alocasia seasonal/dormant?
A: Yes, many alocasias have a period of slower growth (or semi-dormancy) in cooler months. Reduce watering and feeding then.
Q: My plant keeps dropping leaves — what’s wrong with my Alocasia amazonica plant?
A: Dropping can be natural for older leaves, but sudden loss often indicates overwatering or root issues, or stress (temperature/lighting changes). Check roots and care routine.
Q: Can I keep Alocasia outside?
A: In warm, humid climates, Alocasias can be grown outdoors in partial shade. In cooler climates, keep them as houseplants or bring them indoors before cold weather.
Sample 12-month care calendar
- Jan–Feb: Low growth; keep warm and humid; reduce water slightly.
- Mar–May: Active growth repot Alocasia if needed; start feeding; increase watering.
- Jun–Aug: Peak growth; regular feeding and watering; watch for pests.
- Sep–Oct: Slow down fertilizing; monitor water as growth slows.
- Nov–Dec: Rest period; reduce feeding; water sparingly; maintain humidity.
Conclusion
Alocasia amazonica is a bit of a diva: dramatic, demanding, and incredibly rewarding when the conditions are right. It repays attention with glossy, sculptural leaves that elevate any space. The keys are bright indirect light, consistent moisture without waterlogging, warm temperatures, and high humidity. Learn your plant’s signs — it talks to you with droops, spots, and leaf size, and make small adjustments. With routine care and attention, your Alocasia can be a long-lived, show-stopping part of your indoor garden.